
Before you start
Have your completed course records, the correct eCard inventory, and each student’s verified name and email ready. Issue cards only after students meet all course requirements. Need inventory? Use Order eCards and Submit Roster.
1. Open eCards in ATLAS
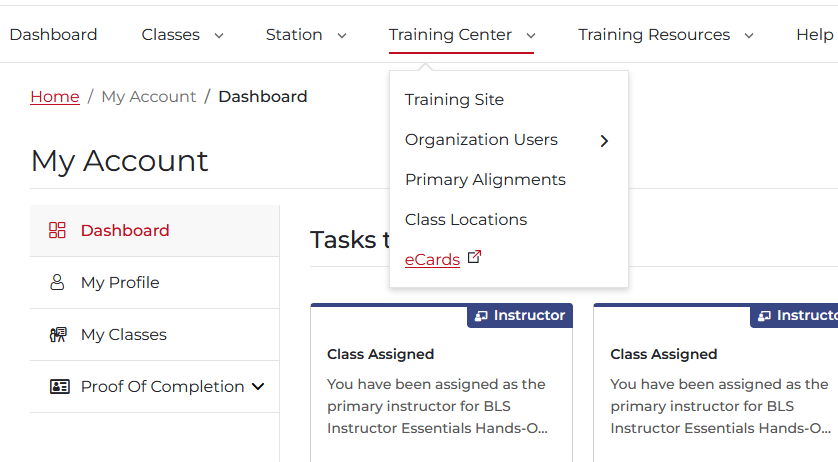
Sign in to AHA ATLAS. Open the Training Center menu and select eCards, as shown below. In the eCards tool, open Manage eCards and choose Assign to Students.
2. Select your instructor inventory
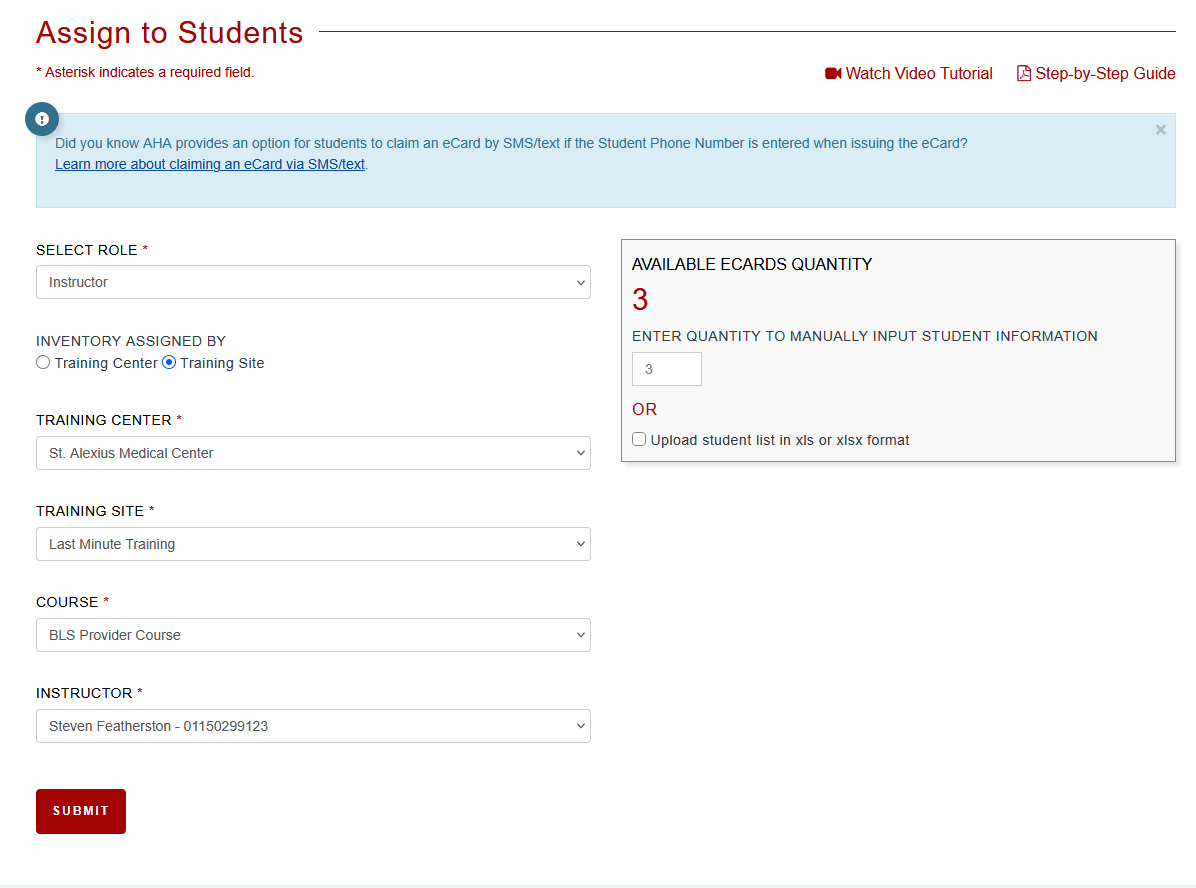
On Assign to Students, make the following selections:
- Select Role: Instructor.
- Inventory Assigned By: Training Site.
- Training Center: St. Alexius Medical Center.
- Training Site: Last Minute Training.
- Course: The course type your students completed.
- Instructor: Your own name and instructor ID.
Check Available eCards Quantity. Enter the number of students you are issuing cards to, then select Submit. The quantity must not exceed your available inventory. The screenshot shows an example of three BLS cards; use your own course, instructor, and student count.
If you prefer a spreadsheet upload, use the XLS or XLSX student list option and the AHA template provided by the tool. Keep the template’s column headings and order unchanged.
3. Enter the course date and student information
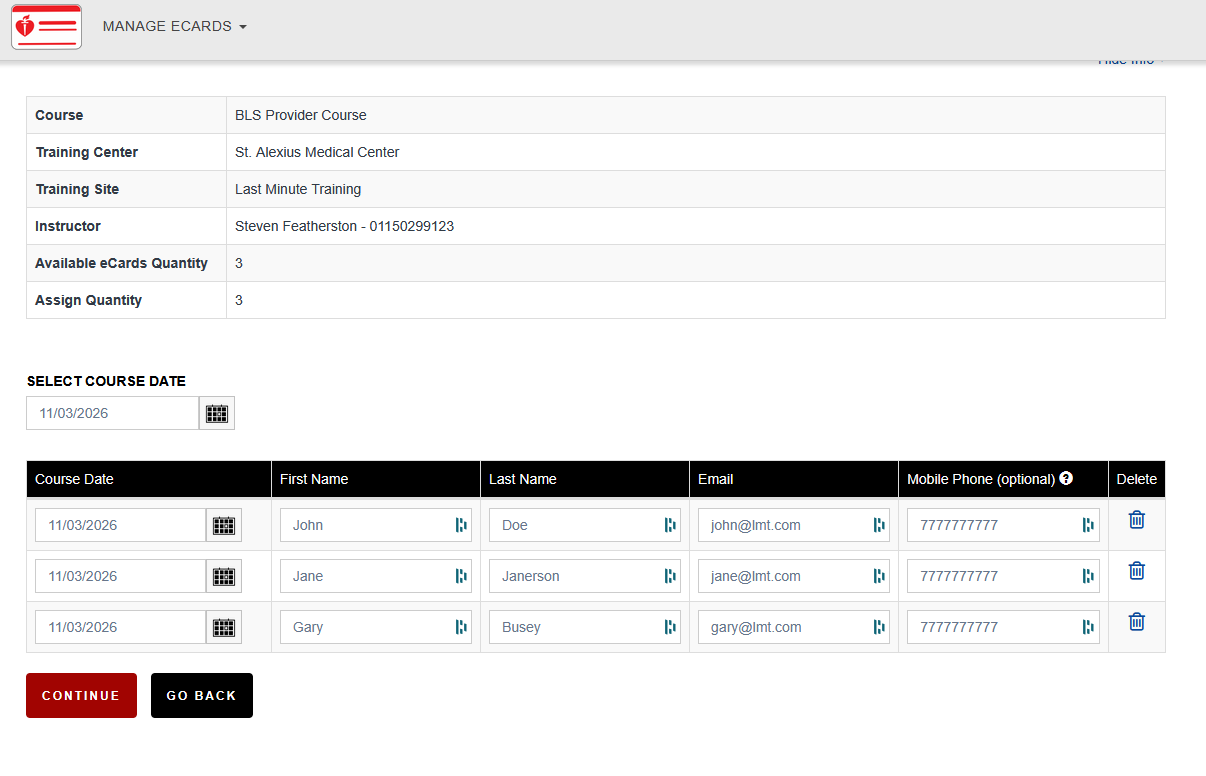
Confirm the course and instructor summary. Enter the actual course date, then complete each student’s first name, last name, and email address. The mobile phone field is optional. Check the date on every student’s row.
Verify each email address with the student. That is where their invitation to claim the eCard will be sent. The names, emails, dates, and phone numbers in this screenshot are examples; enter your students’ correct information.
4. Continue, confirm, and send
- Select Continue after entering the student information.
- On the confirmation screen, review the course, instructor, course date, student names, and email addresses. Go back and correct any errors before sending.
- Once everything is correct, select Send to send the eCards to the students’ associated email addresses.
After sending, use Searching eCards to confirm the records before attempting another assignment. A missing email alone does not mean you should issue a second card.
5. Students receive the email and claim their cards
Each student receives an email from [email protected] at the address entered for their card. They open that email, select the link to claim the eCard, and follow the prompts.
Students can view their eCards only after they have claimed them. Sending the invitation does not complete the claiming process. Each student must claim their own card; once claimed, they can view, save, print, or share it.
Share Claiming eCards (for Students) for the complete instructions and AHA’s official PDF. If the email is missing, have the student check junk or spam. For incorrect card information, see Editing eCards.
Submit your training roster
Sending cards does not report your course to LMT. Follow the separate roster submission instructions for every completed course, including cards sent from inventory you already held.
Official reference: AHA eCard guides and assignment resources.
More HowTo guides
Browse all HowTo guides · Order eCards and Submit Roster · Instructor transfers